My showcards are in! A big thanks to John Q. Do for the beautiful design. Hope to see you at Erica Popp Studios + Gallery this Friday, September 7! Opening reception 5-8 pm. 😀


My showcards are in! A big thanks to John Q. Do for the beautiful design. Hope to see you at Erica Popp Studios + Gallery this Friday, September 7! Opening reception 5-8 pm. 😀
I have recently posted all of my work so far from my current ‘Folklore’ series under the “Current Work – Folktale Series (2013-2017)” section on the lefthand side of the home page, and under the “2010-2013 Paintings” subpage, found under “Previous Work” from the home page. I still have images to post to the 2010-2013 section from the “Tapestry Series”, which was my first series of encaustic paintings, so check back soon! More to come under “Previous Work” for prior years.
I will have a piece in an upcoming show, “No Ceiling, Only Sky”, which opens on Friday, June 2, at the SOHA Gallery in the South Hampton area. The gallery address is 4915 Macklind Ave, St. Louis, MO 63109 (S. of Chippewa, at Neosho). Here are the details from the event page:
Elizabeth M. Willey – “Idun’s Apple”, Encaustic Mixed Media on Panel, 8 x 8 x 1.5 in, 2015
Will be shown in “No Ceiling, Only Sky”, opening June 2, 2017.
These pieces are currently on view through March 11 at Fountain View Manor Memory Care in Granite City, IL in an group art exhibition with 5 other artists. If you’re in the area tonight (Friday, 2/19) between 6-8 pm, I’d love to see you at the Artist’s Reception!
A big thank you to Mary Duban, Executive Director (and Fontbonne alumn) for inviting me to participate in the show!
http://www.fountainviewmemorycare.com/


Local Color layer complete! Next up: adding highlights and shadows to the local color. I’ll go into greater detail about what that means soon.

Loki piece after “burning in” last night’s oil painting. (Gently heating the painted area & wax to bond the oil paint to the beeswax layer below.)

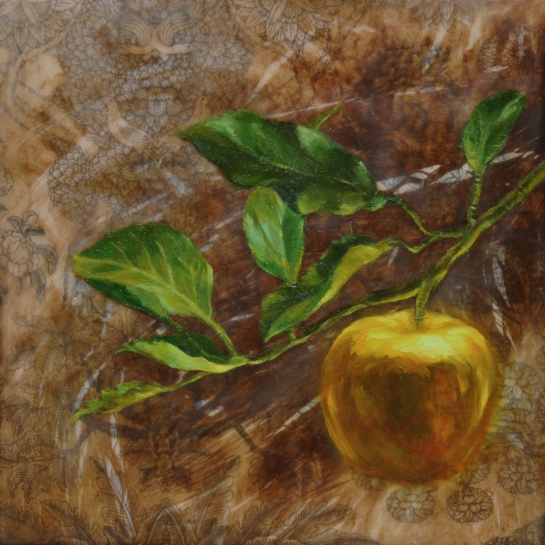
Starting to develop the branch and the golden apple, but they still need work:

Working on my encaustics today. The apple is a laser transfer, and I plan on painting the branch, leaves, and possibly highlights on the apple in oil paint.

Did a laser jet transfer on the other one I’m working on, but I’m not sure I like the position. I think I’m gonna scrape the spider off and add one slightly bigger and a little more lower and left.

“Loki and Idun’s Apple” at the end of the night:

“Anansi” piece – spider resized & repositioned. I think this one looks much better:

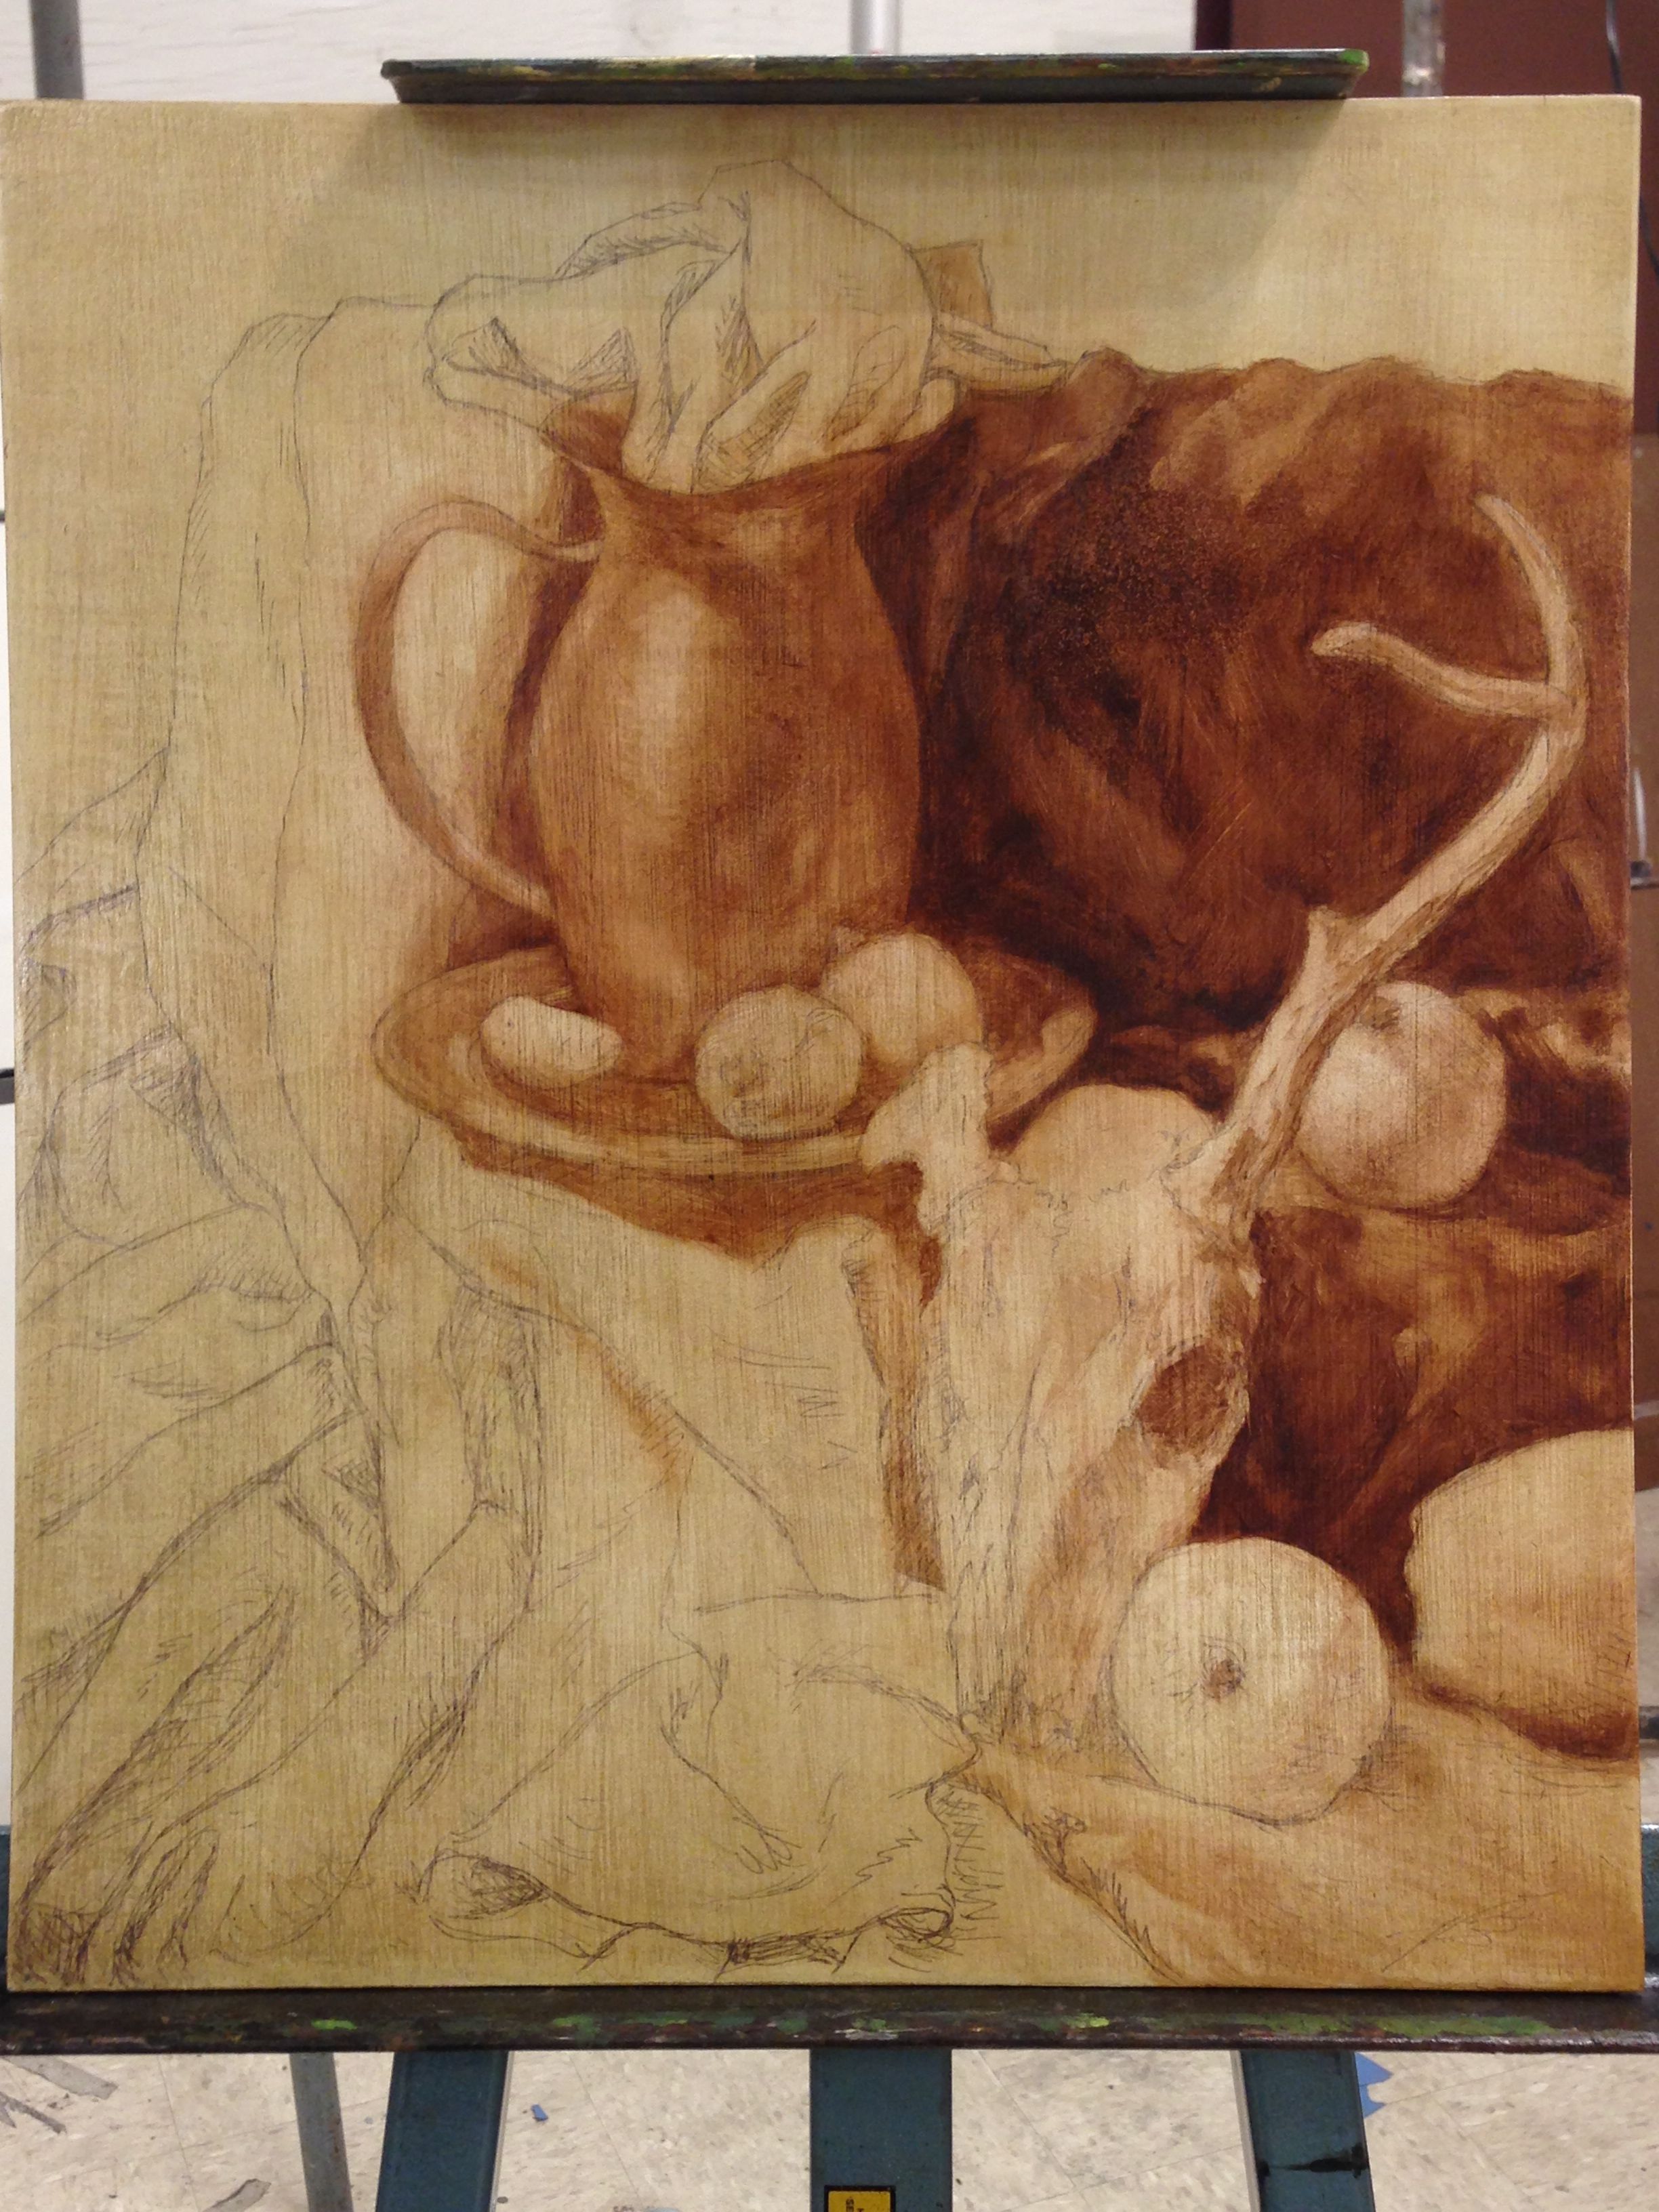
The color on the skull needs to be a warmer white, but otherwise good so far. Still have to put local color on the back wall, pitcher, plate below the pitcher and darker background fabric. Then I can begin modeling the shadows with darker tones.

Finished the umber layer on my still life today. So proud!!

This semester, I’m taking Oil Painting Techniques with Victor Wang. During the course of the class, we will learn three major old master’s oil painting techniques: Jan van Eyck, Titian (Tiziano Vecellio), and Peter Paul Rubens. Currently, we are working on the van Eyck method of painting. I’ll go into more detail later about the other styles (once we get to them!).
We started with a 14 x 16 inch piece of tempered masonite (smooth on both sides) and sanded one side down. Victor showed us how to make chalk gesso the traditional way with Titanium Dioxide, Gypsum and Rabbit Skin Glue (I’ll discuss the recipe in a separate entry) and showed us how to grind it. We then put a couple of layers of the gesso on our panels, sanding in between. Once there was enough gesso applied, we gave it one last good sand to make sure the surface was nice and smooth. A smooth surface is very important to the van Eyck technique.

The full still life
Next, we got to sort through all the props available for still lifes and pick what we might want to paint. I and two other students are sharing our set-up, so we all had approval/veto rights to select the composition that might be good for each of us at different angles.

My chosen view of the still life for our Van Eyck style painting project
Then we each began trying to find the view of the still life that we wanted to focus on and drew the composition onto a piece of newsprint. Once the image was laid out the way we wanted, we flipped the paper over and coated the back with vine charcoal. We then placed this carefully over the gessoed front of our panel and taped the top of the image securely on the back of the panel, so that it wouldn’t move while we redrew over the top of our original drawing, transferring the lines onto the panel below, hoping to keep the proper proportions to everything. Once the image was successfully transferred, the new drawing on the panel was fixed with spray fixative.

Initial drawing to work out the composition

Making old school tracing paper – vine charcoal on back of drawing

Taped top of drawing to back of panel – lower down to trace & lift up to double-check that the lines are matching

Tracing in progress

Original drawing after tracing onto panel beneath

Traced image – sealed with spray fixative
From there, each student took a brown pen (I used a permanent ink Pigma pen) and went over the lines of the transferred drawing, setting a firm foundation to each successive layer of painting.

Inked layer – permanent brown pen to finalize the lines and composition
Once the ink drawing was complete, we mixed a verdaccio color (yellow ochre, ivory black and a little titanium white if necessary) and applied all the paint over the surface of the panel, using 1:4 or 1:5 ratio linseed oil/turpenoid medium to help coat the panel and create a seal on the gesso. Chalk gesso is very dry and tends to soak the oil out of anything you put on it, so it often takes a layer of Liquin or linseed oil before each painting session in the early stages to keep the paint from absorbing too much and leaching out the color. The verdaccio is applied and then wiped with a soft paper towel or rag to even out the application and wipe off extra oil and paint.

Verdaccio layer demo – used yellow ochre, ivory black and a touch of white to create a greenish background color

Painted color onto panel and used 1:5 linseed oil/turpenoid medium to thin; wiped down evenly once applied

Verdaccio layer completed
Next class, we began to define the mid-tones and the shadows of the composition with a burnt umber underpainting layer, to establish the image more fully and begin to add depth. I’m finding this layer difficult, because I’m only using one color and I can only use medium to adjust the darkness/lightness of the image. Who knew it could be so hard to paint deep shadows with one color? This stage goes very slowly because there is a lot of detail to the underpainting, depending on your design, and I’m about 1/2 to 2/3 of the way through this layer after 3-4 painting sessions, after around 10 hours or so of painting so far. From what I understand, the next layer is the local color layer, so I’ll have to post more once we get to that level. Hopefully it will go a lot more quickly!

Preparation for the umber layer – Liquin and burnt umber

Painting set up

First paint session

Victor demonstrating blending techniques and how to add depth to dark area

Second paint session – another student hard at work

Midway through second paint session

End of second paint session
End of third paint session
